Showing posts with label dessert. Show all posts

Wednesday, April 27, 2016

Raw chocolate-orange mousse cake

This cake is honestly one of the most tasty, creamy and delicious cakes I have made :) Have I told you that I looooooooove avocados?  Yesssss, you guest it right... this cake is made of creamy avocados, although you will not be able to tell :) The taste is just like the traditional chocolate mousse made with tons of cream and dairy products. With this cake you will be able to enjoy the same taste, but in a much more healthy form:P
I added the orange juice and zest, because I really enjoy the combination of chocolate and orange. The two tastes harmonize well together and make this cake really a special treat :)

Sooo, let's see how to prepare it :) 
Crust:
- 100 grams of walnuts (soaked overnight) - you can use any nuts of your choice
- 150 grams of almonds (soaked overnight)
- 2 cups of Medjool dates
- pinch of salt
- pinch of pure vanilla
- 2 tbsp coconut oil


Filling:
- juice of 1 orange, freshly squeezed 
- zest of 1 orange
- 1 cup of Medjool dates (soaked for  30 minutes)
- 1 cup of coconut oil (melted)
- 2 tbsp maple syrup
- 4 heaping tbsp of unsweetened cocoa powder (preferably raw)
- 3 ripe avocados
- 1 tbsp psyllium husk 
- 1 cup of cashew nuts (soaked for 2-3 hours)
- 1/2 cup of rice milk (or any plant based milk)


Method:
Crust:
  1. Make sure that the dates are pitted. If they are a bit more dry, soak them for around 30 minutes. Usually soft Medjool dates don't need to be soaked :) 
  2. Soak the nuts overnight, or at least for 10-12 hours. The next day discard the water and wash them through running water. 
  3. Place all ingredients to a S-blade food processor and process until a smooth dough is formed, and everything sticks together (usually this means a big ball of dough running around your food processor ;).
  4. Place the crust to a cake form, even it out with your fingers throughout the base of the form, and place it to the freezer while you are working on the filling.
Filling:
  1. Please make sure the dates are as well pitted and soak them, if they are more on the dry side.
  2. Melt the coconut oil and place it to a mixing bowl together with the maple syrup. Add the cocoa powder spoon by spoon, slowly stirring each spoon into the coconut oil - maple syrup mixture. Keep on stirring until a smooth paste is formed. This will make it easier to mix the cocoa well throughout the filling. 
  3. Place all ingredients, but the milk, to a S-blade food processor (or a high speed blender, if you have one). Leave a little orange zest for decoration.
  4. Start by pressing the "Pulse" function on your food processor, and gradually mix all ingredients well together.
  5. Add as much milk as you need to create a very smooth dough -> keep on mixing until you create a very smooth, chunk free paste. 
  6. Take the crust out from the freezer and pour the filling over it. Even the filling out using a spatula and place the cake to the fridge. Refrigerate for 4-5 hours before serving :)
 Enjoy :)

Tuesday, December 8, 2015

Delicious carrot cake

 
I have always loved carrot cake, but I have never found a vegan alternative, which would resemble the original one.  This has changed, when a friend of mine, Maren, baked the PERFECT carrot cake for my bachelorette party. I instantly fall in love with this cake and have made it a couple of times since then :) 
She found the recipe on the internet and I made a few modifications to it. 
This cake has the perfect consistency, it is fluffy, moist, but sticks together at the same time. Give it a try, I am sure you and your family will love it :-)

Here is what you will need:
 - 400 grams carrots
 - 400 grams of spelt flour
 - 1 package of baking powder
 - 1/2 tsp of baking soda
 - 200 grams raw brown sugar
 - 100 grams chopped nuts (walnuts, almonds or hazelnuts)
 - 1 tsp pure vanilla powder (or vanilla sugar - in this case use less raw sugar)
 - 1 tsp cinnamon
 - 1/2 tsp cardamon (optional)
 - 1/4 tsp ginger powder

 - a pinch of salt 
 - a few drops of natural orange essence
 - juice of 1 lemon
 - 175 ml cold pressed sunflower seed oil (or coconut oil)

 - a little bit of powder sugar
 

Method:
  1. Preheat the oven to 165° on circulating air, or 180° top and bottom heat. 
  2. Peel and wash the carrots. Grate them into small, fine pieces. I used a food, which made this step much faster :)
  3. Add the carrots to a mixing bowl, add the oil, lemon juice and orange essence. Mix well and set aside at least for 10 minutes. 
  4. In a separate bowl mix together the dry ingredients: flour, baking powder, baking soda, brown sugar, vanilla, cinnamon, cardamon, ginger powder, salt.
  5. Add the carrot mix to the dry ingredients and mix well. Use your hands to mix the dough together. It takes a while until all ingredients are mixed, so stay with it, it will nicely come together :)
  6. Take a rectangular cake pan (or whatever pan you have at home) and coat is thinly with coconut oil.
  7. Pour the dough into the pan and press is slightly with your fingers, evenly distributing it throughout the pan.
  8. Bake on 165° for about 60 minutes. 
  9. Leave the cake inside the pan for about 10-15 minutes. After that, take it out from the pan and leave it on a rack to cool.
  10. I didn't put an icing on the top of the cake, as I found it already sweet enough. If you like, you can add a bit of powder sugar on the top of the cake just before eating.  

    Enjoy :) 


ps: this is a view from the terrace where I took the pictures in the Sunset. Every day I am grateful to live in such a breathtaking place <3

Thursday, March 19, 2015

Mixed bliss balls


I call these balls bliss balls, because first of all they are super easy to make, that's bliss #1, second of all they taste AMAZING, that's bliss #2, and third of all you can make a nice gift to your friends with them so they as well feel the happiness :) That's bliss #3.. enough reasons to make them right away :))
Ouh and I forgot... they are super healthy, 100% gluten free, dairy free, egg free, great to just snack on them when you have a sweet tooth, or as a post-workout snack :) ... bliss #4, 5, 6, 7... :):):)  


What will you need:
- 1 cup cashew nuts, soaked for 2-3 hours
- 2 cups dates, soaked for 30 minutes
- 3/4 cups almonds, soaked overnight
- 10 grams cocoa butter (or coconut oil)
- 60 grams wild dried apricots
- 1 tbsp chia seeds
- pinch of salt
- 1 tsp cinnamon
- 1/4 tsp ginger powder
- pinch of cardamon
- 1 tsp date syrup (or maple/agave syrup)
- coconut shred, sesame seeds, thinly cut almonds for coating

Method:
  1. Rinse all soaked nuts and dates, set aside.
  2. Melt the cocoa butter on a bed of hot water.
  3. Place the cashew nuts, chia seeds, date syrup, melted cocoa butter together with the dates, apricots and spices to the food processor. Process until a smooth, sticky paste is formed and everything is well combined. If the paste is too dry, you can add more date syrup or a bit of water.
  4. Add the almonds and pulse a few times, so the almonds are not completely processed and some coarse pieces reamin in the paste.
  5. Take a small portion from the paste and form small balls between your hands.
  6. Coat the balls with coconut shred, sesame seeds or cut almonds .. as you like :).

I prepared small bags with mixed bliss balls in them and gave them to my friends :) You can make them too and make someone else happy :D 


Friday, February 20, 2015

Valentines day raw cake

Do you celebrate Valentines day?  We don't really make it a special day, as we think that we should express our love not only on one particular day, but whenever we feel like giving a nice love gesture or a little gift to each other :) And that is certainly more often, than only one day in a year :):):)
Nevertheless, it was a good excuse to make another raw cake, this time with less nuts and more avocados :)

What will you need:
For the crust:
- 1.5 cups of dates
- 2 cups of walnuts
- 1 tsp vanilla
- pinch of salt
- 1 tbsp coconut oil
- 1 tsp cocoa

For the filling:
- 0.5 cups of dates 
- 1 cup of cashews 
- 3 avocados
- 1/2 cup of melted coconut oil  (or 12 tbsp)
- 200 grams frozen berries
- 1 tbsp psyllium husk 
- 1/2 cup or rice milk (or more, if needed)
- 2 tbsp agave nectar
- 2 tbsp raw cocoa powder
- pinch of vanilla 
- pinch of salt


Method:
  1. Melt the coconut oil by simply putting the whole jar in a pot filled with hot water. Wait until the coconut oil melts. 
  2. Crust: Place the dates and the coconut oil in a food processor and process until a smooth paste is formed. Add in the walnuts, salt and vanilla and pulse a few times, so the walnuts stay chunky. Press the dough firmly into the bottom of either a cake or pie form. Put the crust to the freezer to set for approximately 30 minutes.  
  3. Meanwhile, prepare the filling. Place all ingredients into a high speed blender but LEAVE the cocoa out. Blend on high until a very smooth and creamy batter is formed. If you need, add more rice milk (or liquid sweetener for a sweet tongue :) to the paste. If you don't have a blender you can as well use a food processor. 
  4. Take about 3 tbsp of the batter in a separate bowl for decoration.
  5. Add the cocoa powder to the blender, and process until everything is mixed well together.
  6. Pour the filling over the crust, distribute evenly using a spatula or by shaking the form side to side.
  7. Take the paste for decorating, which you have previously separated (in step 4). Put it into an icing kit, and decorate your cake following your own fantasy :)
  8. Place the cake to the fridge and refrigerate at least for 3-4 hours. The best is to refrigerate overnight, covered.
  9. Serve the cake immediately after taking out from the fridge.  


Wednesday, January 21, 2015

Pink raw swirl cake


Hi all. Isn't this cake pretty? I find it very nice with the swirls. I have tired the swirls the first time :) It is very easy, I will describe it in the recipe.
I made this cake a long time ago, when we still had roses in the garden, but I wouldn't mind having a piece now :) how about you? :)

What will you need:
Crust:
- 2 cups walnuts, soaked for 3-4 hours
- 1 1/4 cup Medjool dates, soaked for 30 minutes
- pinch of salt
- a bit of pure vanilla

Filling: 
Cashew "cheese":
-1 3/4 cup cashew nuts, soaked for 3-4 hours
- 2 tbsp raw honey
- 2 tbsp coconut oil, melted
- pinch of salt
- 1 tbsp lemon juice
- 1 frozen banana
- 3/4 cup Medjool dates, soaked for 30 minutes
- approximately 1/2 cup rice milk (or any other plant based milk)

Berry filling: 
- approximately 1/2 cup rice milk
- 120 grams of frozen mixed berries
- 1 tbsp coconut oil, melted 

Method:
  1. Place the walnuts for the crust in a food processor and pulse until a coarse meal is formed. Add in the dates and process until you have a sticky dough. Press the dough firmly into the bottom of either a cake or pie form. Transfer the crust to the freezer to set for approximately 30 minutes.  
  2. Meanwhile, prepare the cashew "cheese" filling. This is done simply by placing all the ingredients into a high speed blender and blending until you have a very smooth and creamy paste. If you don't have a blender, don't worry, you can as well use the food processor. However, I find that processing the cashew with all other ingredients in a high speed blender gives even a more creamier texture.
  3. Pour 3/4 of the filling over the crust, distribute evenly using a spatula or by shaking the form side to side. But not too much shaking here ;)
  4. Add the berry filling ingredients to the remaining cashew "cheese" in the blender. Blend until smooth. The berry mix should have an ice cream texture, it shouldn't be too watery.
  5. Take pieces of the berry filling with a spoon and place it over the cashew  "cheese" (which is still liquid), leaving spots of the cheese filling visible.
  6. Take a wooden stick and start mixing the berry filling into the cashew "cheese" simply by making little circles all over the cake. Go crazy :) This will mix the two layers together nicely.
  7. Place the cake to the freezer and freeze for  3-4 hours. Cover, and freeze overnight. 
  8. Take the cake out from the freezer 15-20 minutes before serving. 

Enjoy :)

Monday, January 5, 2015

New years banana pancakes


Happy new year to everyone. I haven't been posting for a while, because I was away for the holidays. I hope you had a wonderful time with your friends and family:) We have started our new year with these cute little pancakes in our brand new pancake pan, which we have received for Xmas :) I guess my family already knows, that we are pancake addicts :P

here is what you will need:
- 1 cup of spelt flour
- 1 cup of oat-bran (oats cut very thinly)
- 2 cups of rice milk (you can use as well mineral water or any other plant based milk)
- 1 ripe banana
- 1 tsp pure vanilla
- 1 tsp turmeric
- 1/2 tsp cardamon (optional)
- a pinch of salt
- pinch of nutmeg 
- 2 tsp baking powder (phosphor free)
- 1 tbsp sugar beet syrup (or maple/date syrup)
- date syrup, banana and walnuts for topping


  1. Start with mashing the banana with a fork.
  2. Combine gradually all ingredients in a mixing bowl and add the mashed banana.  
  3. Leave the dough to sit for 10 minutes, so that the oats can soak up the liquid. Add mineral water or plant-based milk, if the batter gets too thick. The batter should be fairly thick, but thin enough to drip from the whisk.
  4. Coat a skillet pan with a bit of coconut or olive oil and heat it up to medium heat.
  5. Take a part from the dough and pour it to the skillet making a circular form.
  6. Cook the pancakes on medium until little bubbles are formed and outer edges become golden. Flip the pancakes and cook until golden.
  7. Top with date syrup, walnuts and bananas :)

Enjoy :)

Wednesday, December 10, 2014

Xmas raw snow balls

These Christmas snow balls are very easy to make and will make you and your friends and family happy :) You can prepare such raw balls in a few minutes and pack them into a nice Christmas package for your friends as a gift.  This amount makes approximately 22 raw balls. 


What will you need:
- 180 grams of Medjool dates (or 13 bigger dates), soaked for 30 minutes
- 1 cup cashews, soaked for 2-3 hours
- 1 tbsp almond butter
- pinch of salt
- 1/4 tsp cinnamon
- 1/4 tsp vanilla
- shredded coconut for coating

  1. Place dates and cashew nuts to a food processor and pulse until they combine well, but the dough is not completely smooth. You should be able to see small pieces of cashew nuts.
  2. Add remaining ingredients and pulse a couple of times.
  3. Take a small part of the dough with your fingers and form small balls between your hands.
  4. Coat the balls in coconut shred.
  5. Refrigerate the balls for 2-3 hours before serving. The balls keep fresh in the fridge for 4-5 days.

Enjoyyy :)


Tuesday, October 28, 2014

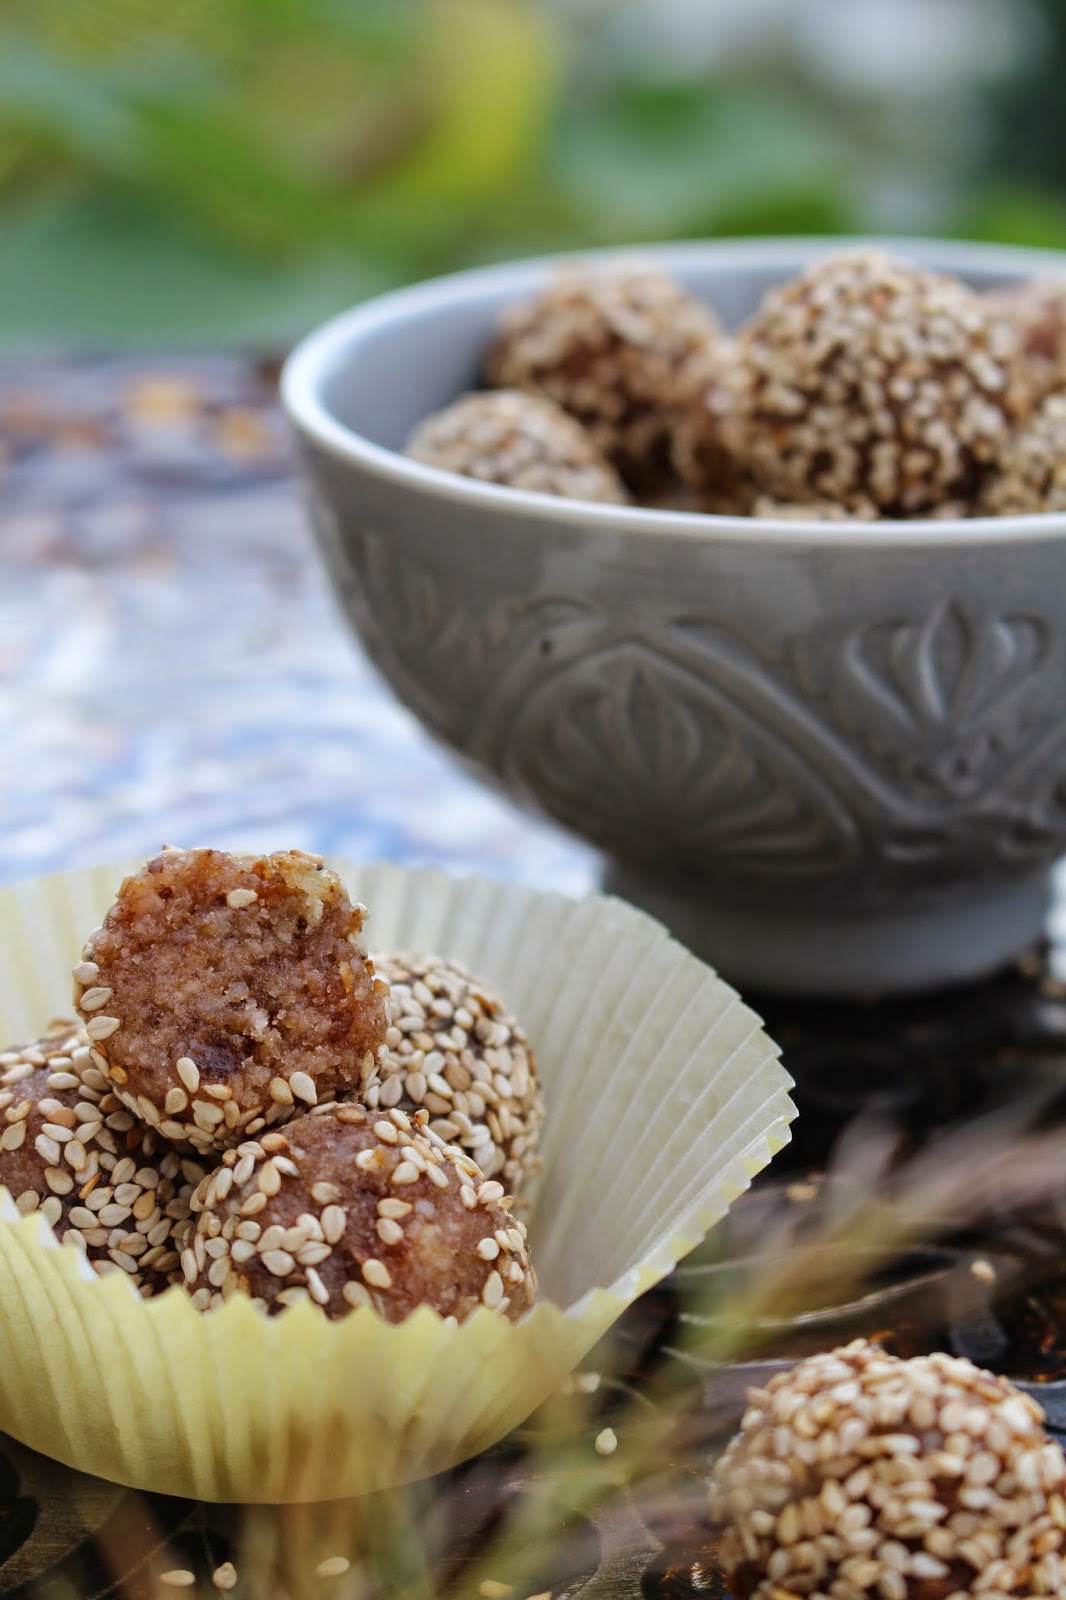
Oriental raw balls


These balls are very easy to make and remind me those oriental sweets from the middle east. I guess that is because of the cardamon. Try them out, they are fast, 100% gluten and refined sugar free healthy treats :)


What will you need:
- 1cup of brazil nuts soaked, overnight
- 1/2 orange juice, freshly squeezed - optional 
- 15 Medjool dates, soaked in orange juice (or water) for 30 minutes
-  1 handful of dried wild apricots
-  a pinch of salt
-  1/2 tsp ground cardamon
- sesame seeds for coating


Place the Brazil nuts to the food processor and process until  a sandy texture is formed. Add the remaining ingredients and process until everything is well combined and a smooth dough is form. Form balls with your hands and coat them in sesame seeds.


Enjoy :)

Tuesday, October 14, 2014

Post workout raw balls


These balls are perfect after a strength training workout, as they provide proteins, vitamins and healthy carbohydrates to fuel your muscles. In addition...they taste great too:) 

I have used mulberries in this recipe, but feel free to use any dried berries. Mulberries are native in China and are very low in calories. 1 cup of mulberries contain only 60 calories. They consist of 90% healthy carbohydrates, which are perfect after any workout, as they will fuel your muscles. Other health benefits of these cute berries are (source: http://www.livestrong.com/article/408406-health-benefits-of-mulberries/)
 

  • they are high in fiber, which helps the body to control blood sugar level,  promote sense of fullness and prevent over eating
  • unlike other berries, mulberries are high in iron. 1 cup of them contains 14% of recommended iron for women and 32% for men
  • they are rich in Vitamin C and K. Vitamin C helps iron absorption, therefore they are perfect if you need to boost your iron intake. Vitamin K contributes to bone tissue development and also helps control the thickness of the blood
  • they are a great source of Riboflavin (Vitamin B2). B2 helps defend tissue damage against free radicals. It also supports oxygen transport by helping to make red blood cells, and aids in converting food into energy. 

What will you need:

- 6-7 Medjool dates, soaked for 30 minutes
- 3/4 cup of hazelnuts, soaked overnight
- 1 tsp cocoa
- pinch of salt
- 1 handful of Mulberries (you can use any dried berries)
- 1 tbsp chia seeds, soaked for 30 minutes
- coconut flour for coating (or coconut flakes)
  1. Drain the hazelnuts and place them into a food processor with an S-blade. Process until hazelnuts are broken down to small pieces
  2. Add remaining ingredients until a sticky dough is formed and everything is well combined together 
  3. Take a small part of the dough and form balls between your hands.  Coat the balls in coconut flour (or coconut flakes) generously 
  4. Place the balls to the fridge for at least an hour before serving.

Enjoy :)